Almost everyone running a WordPress website had to go through the troubles of migrating their sites to a different web host. Currently, you too might be wondering about switching web hosts, which is most likely why you ended up here. If that is the case, there is no need to worry about it anymore. We have prepared an easy to follow step-by-step guide to help you migrate your WordPress website.
So, without further ado, let’s get started:
Pick A Web Hosting Provider
There are multiple reasons why you might need to switch your web hosting provider. Maybe your site has grown a lot and their current plans can’t give you enough resources to properly run your website. Or their plans are too expensive and you want something within your budget.
Whatever be the case, once you have settled that your current web hosting provider isn’t cutting it, the immediate next step would be finding a new web host that meets your current requirements.
Do Note: Many popular web hosting providers offer site migration services as a complimentary service or a paid add-on. Do remember to get in touch with their support team, and ask if they provide free site migration services. If they do, then all your troubles are resolved right then and there.
Now, if your new web host doesn’t provide any site migration options, then you will have to go through the following steps. Remember not to install WordPress on your new web host just yet. Leave it as it is, without any files or folders in the main directory.
Website Migration Using the Duplicator Plugin
Once you have selected a new web host, it is time to head on over to your original WordPress website. Go to your dashboard and install a migration plugin to help you out. For the purpose of this read, we will be using the Duplicator migration plugin that is available for free from the WordPress repository.
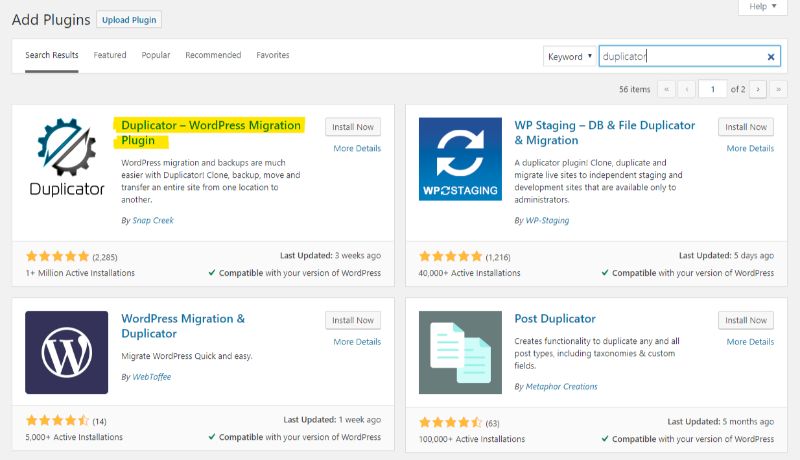
One of the reasons for picking this plugin is because it is the most feature-rich free option. Furthermore, it helps you smoothly migrate your WordPress website without affecting your SEO score.
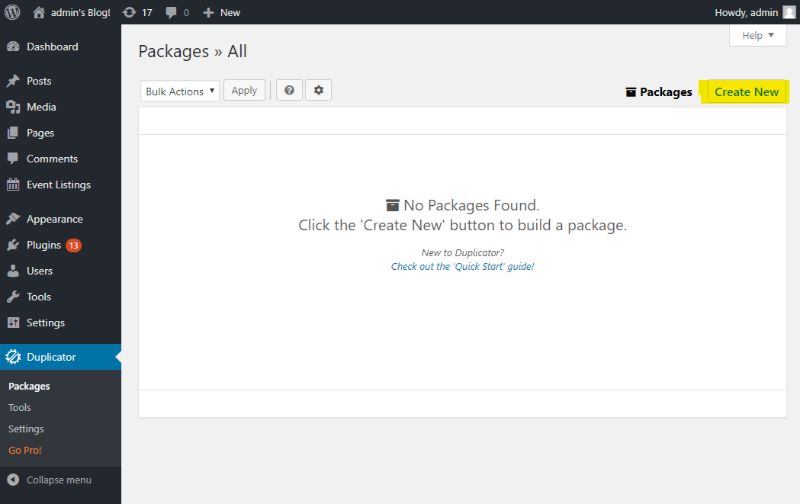
With that being said, here is a quick walkthrough on how to use the plugin to migrate your website. First, head on over the Duplicator section from your WordPress dashboard sidebar, and click on Packages.
Click on the “Create New” button as shown in the image below:
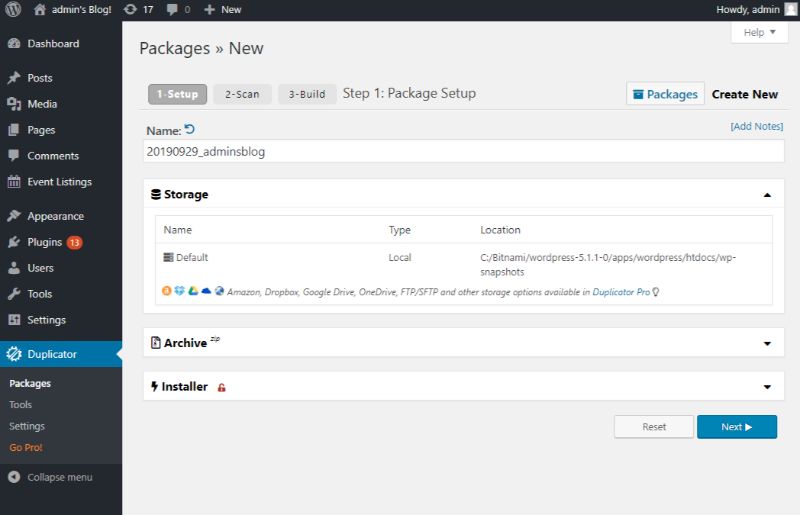
The following page will appear. Click on Next to start the setup process.
The plugin will now perform a system scan to make sure all your files and folders can be smoothly migrated. Make sure that all of them check-outs and says “good” as shown in the image below.
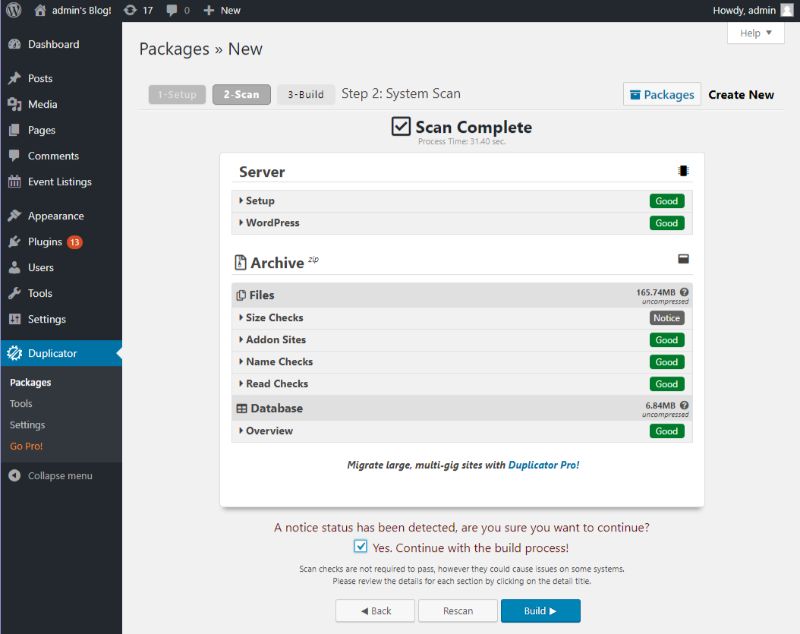
Now, Click on the Build Package or Build option.
After waiting for a couple of minutes for the plugin to do its job, all your files and folders will be ready to download. You will get two distinct buttons for downloading the Installer – which will automate the installation process to your new website, and the Archive package – which is basically a copy of your whole website.
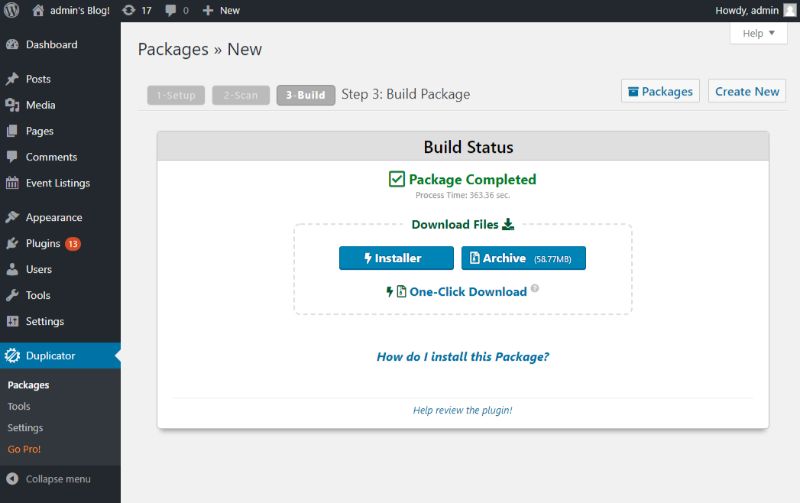
Once you are done here, it is time to import your website to the new host.
Import your WordPress website to the New Host
For this one, you will need to connect with your new web host using FTP. If you have no experience using FTP to upload files to WordPress, then here is an easy guide to help you.
Basically, during the import process, you will need to enter your website’s domain name as the host. However, since it is pointing to your old host, you will have to manually enter the appropriate server IP address and server hostname.
You can get this information from the hosting cPanel dashboard. Or, you can simply ask your hosting support team for the information.
Once you are connected to your new host with the FTP client, it is time to upload both the Installer and Archive files you just downloaded to the root directory of your website. However, do remember that the root directory is empty before moving forward, and doesn’t contain any previous WordPress Installations.
If you are having trouble finding the root directory, it is generally the /username/public_html/folder. However, you can ask your support team if you are having issues.
Read Your MySQL Database On Your New Server
Before you run the Installer file on your new web host, you will need to create a new MySQL database. If there is already an existing MySQL database then you can skip this step.
If not, then you will need to head on over to your cPanel dashboard, find the MySQL database icon, and click it. Now, enter the name of your new database and create your new database.
Next, you will need to create a new user profile and add it to your database. You will also need to set up a username and password for the newly created user profile. Remember it as we will need it in the next step.
Finally, Run The Installer
Once you are done following all the above steps, head on over the following URL – http://www.yourdomain.com/installer.php.
You will find the Duplicator installer menu. It will start to run a couple of tests. Wait till you see the ‘Pass’ remarks, besides the Archive and Validator options. Now, simply check the terms and conditions button, and hit ‘Next’.
In the following screen, you will need to enter your MySQL host, database name, username, and password. The host will likely be localhost.
Once you have entered all the details, you can click on the ‘test database’ option to see if everything is running okay. Now hit the Next button and Duplicator will begin importing your WordPress database from your Archive file to your new database.
The following step will ask you to update the URL or Path. However, since you are not changing your domain name, leave it as it is, and click Next to continue.
At the final step, Duplicator will give you a Site Login button so you can enter your newly migrated WordPress website and finalize the setup.
All That Remains Is To Update Your DNS
By now, you have successfully migrated your WordPress website to your new web host. The only problem is that your domain name still points to the old server. Now, to update the domain name, you will need to switch your DNS nameserver.
This process will vary depending on your web hosting provider. Everyone uses a different user interface. Generally speaking, you will need to go through the following steps – go to your domain management area > search for nameserver settings > click on any update option > and enter your new nameserver type.
Alternatively, you can ask your Hosting Provider technical team for assistance.
Now, a DNS change typically takes anywhere between 4 – 48 hours. So wait till the migration is complete and you are now completely free from all ties with your old hosting provider.
If you need a WordPress developer, get in touch.